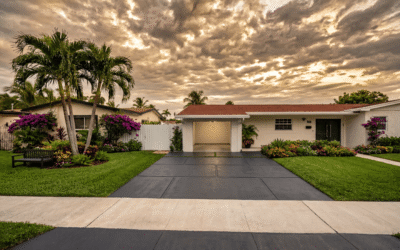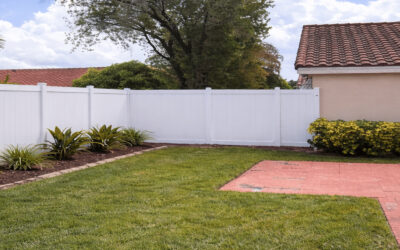
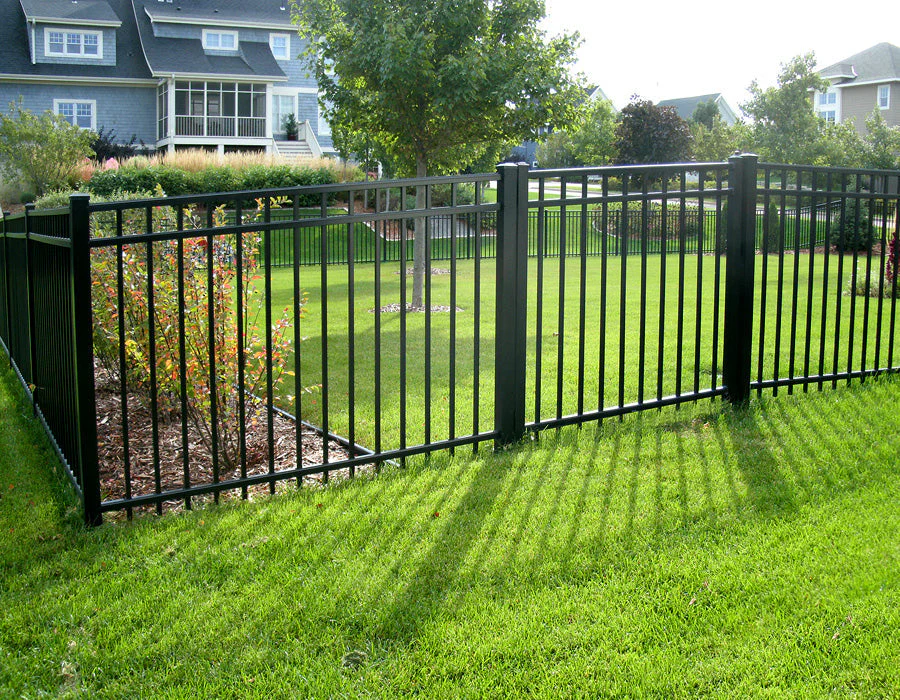
Aluminum fencing is one of the most popular choices for Florida homeowners, and for good reason. It handles humidity, salt air, and intense UV exposure without rusting, warping, or needing a fresh coat of paint every season. If you’re searching for how to install aluminum fence on your South Florida property, this guide walks you through every step: planning, permitting, digging, setting posts, attaching panels, and knowing when the DIY route makes sense versus hiring a licensed contractor.
At Canet Group Inc., we install aluminum fencing across Miami-Dade and South Florida daily. This guide reflects what we see on real job sites, including the Florida-specific details that generic tutorials leave out.
Why Aluminum Fencing Works So Well in Florida
Before getting into the how-to, it helps to understand why aluminum is the go-to material for properties in this region. Unlike wrought iron, aluminum doesn’t rust, which is a critical advantage in South Florida’s coastal humidity and salt-spray environment. Unlike wood, it won’t rot, warp, or splinter in the summer rain cycles. And unlike vinyl, it provides the open, elegant aesthetic that most HOAs and pool codes in this area require.
Aluminum fencing also satisfies Florida’s pool safety barrier requirements under Florida Statute 515, which mandates a barrier of at least 48 inches in height around residential pools with picket spacing no greater than 4 inches. That makes it one of the few materials that checks the box on both aesthetics and legal compliance in a single installation.
Step 1: Plan Before You Dig
Every successful fence installation starts on paper, not in the ground.
Measure your perimeter. Walk the property line and measure every run of fence you want to install. Sketch a rough diagram noting corners, gates, slopes, and any structures the fence will meet such as house walls, pool equipment pads, and sheds. Aluminum fence panels typically come in 6-foot or 8-foot widths, so your linear footage will determine your panel count and post count.
Know your property lines. Pull your property survey before you mark anything. Installing a fence even a few inches over the line can result in a costly removal order. If you live in an area with easements, such as utility corridors or drainage easements common in South Florida, you may not be able to place a fence in certain spots at all.
Check HOA rules first. Many communities across Miami-Dade require HOA architectural review committee approval before a building permit is even submitted. HOA decisions can take 30 days or longer if the committee meets monthly. The common and expensive mistake homeowners make is getting the permit first, then discovering the HOA requires a different color, style, or height. Get HOA approval first, then permit.
Call 811 before you dig. Florida law requires you to call 811 (Sunshine State One Call) at least two business days before any digging. Utility lines in South Florida, particularly irrigation and electrical, are often shallower than expected.
Step 2: Pull Your Permit
Yes, most Florida municipalities require a fence permit, even for residential aluminum fencing. This is not a step to skip.
Permit requirements vary by city and county. In Miami-Dade, the City of Miami, Coral Gables, Hialeah, and other incorporated areas all have their own building department processes and fee structures. Permit fees generally run between $20 and $60 for a standard residential fence, though projects with pool barriers or gates often require additional documentation including a site plan and barrier affidavit.
If you’re installing a pool fence specifically, Florida Statute 515 and the Florida Building Code Section R4501.17.1 both apply. Inspectors will verify gate hardware, latch height, picket spacing, and clearance from the ground. Failing inspection means going back to square one, so it’s worth doing it right the first time.
A licensed contractor like Canet Group handles the permitting process on your behalf, which eliminates the back-and-forth and ensures your project passes inspection.
Step 3: Gather Your Tools and Materials
For a standard do it yourself aluminum fence project, here’s what you’ll need:
- Post hole digger or rented auger (strongly recommended for more than 10 holes)
- Measuring tape and pencil
- String line and 18-inch stakes
- Level (spirit or laser)
- Power drill with 1-inch self-tapping screws
- Concrete mix (80 lb bags)
- Gravel (for drainage at the base of each hole)
- Safety glasses and work gloves
For materials, count your panels first, then calculate posts. Line posts are placed between fence panels. Corner posts go at every 90-degree turn. End posts go wherever the fence terminates, whether that’s at the house, at a gate, or at the end of a run. Gate installations require heavier-walled hinge posts designed to support the swinging load.
Step 4: Lay Out Your String Line
Once you know your fence line, drive an 18-inch stake at every corner, end point, and gate location. Run a string line taut between the stakes. This is your reference for keeping posts perfectly aligned. In Florida’s sandy, uneven soil, skipping the string line is one of the most common DIY mistakes. By the third post, a misaligned start becomes very visible and very difficult to correct without pulling posts.
Step 5: Dig the Post Holes
Post hole depth in Florida is different than in northern states. In colder climates, posts must go below the frost line. In South Florida, the concern is sandy, loose soil with relatively poor load-bearing capacity, combined with hurricane-force wind loads.
Plan to dig post holes to a minimum depth of 24 inches (2 feet) for standard residential fencing, and up to 30 inches or more for taller fence sections or exposed coastal properties. The hole diameter should be roughly three times the post width, which is typically 8 to 10 inches for a standard aluminum post.
Fill the bottom of each hole with 2 to 3 inches of gravel before setting the post. This promotes drainage and prevents water from pooling at the base, which can erode concrete over time in South Florida’s heavy rain season.
Step 6: Set Your Posts in Concrete
This is the most critical step in the entire installation. Poorly set posts will allow the fence to lean, shift, or fail under wind load, and in hurricane country that’s a serious problem.
Set your first post (a corner or end post) and use your level to confirm it is perfectly plumb on all sides before the concrete sets. Fill the hole with concrete mix, leaving the top 2 to 3 inches below ground level, then backfill with dirt and pack it firmly. This technique prevents pooling water from sitting on the concrete cap and working into the post base over time.
Allow concrete to cure for a minimum of 24 to 48 hours before attaching panels. Rushing this step causes posts to shift during panel attachment, throwing off alignment for the entire run.
Florida-specific tip: Don’t install during rain or with rain in the forecast. Wet holes dilute the concrete mix and result in weak post footings.
Step 7: Attach the Fence Panels
Once posts are set and cured, attaching panels is the most straightforward part of the process.
Aluminum fence panels are pre-assembled and designed to slide into the pre-routed holes or channels on your posts. Start at one end of a fence run and work your way down. Use a panel as a spacer to mark where the next post goes before it’s set. This keeps your spacing consistent without relying solely on measurement.
Place the first panel between the first two posts. Check for level. Once aligned, drill 1-inch self-tapping screws into the pre-drilled pilot holes on each post to secure the panel. Repeat down the line.
Dealing with slopes: Florida yards are rarely perfectly flat. If your yard has a slope, you have two options. For gradual grades, many aluminum fence panels are rackable, meaning they can flex up to 12 inches per panel to follow the terrain. For steeper slopes, stepped installation is used, where each panel drops at uniform increments at each post. Stepped installation requires posts with pre-routed holes at the correct heights and is harder to execute without professional experience.
Step 8: Install Gates
Gates require heavier-walled posts and specific hardware. For pool code compliance in Florida, gates must be self-closing and self-latching from any open position, with the latch located at 54 inches or higher on the pool side, or enclosed so a child cannot reach through the fence to operate it.
Even if your fence isn’t for a pool, a properly hung gate is critical. A gate that sags, swings open on its own, or refuses to latch is both a security problem and a sign of incorrect installation. Hinge hardware should be rated for the weight of the gate. Double-check alignment before your concrete fully cures on the hinge post, because a gate post that’s even slightly out of plumb makes proper gate operation nearly impossible to achieve after the fact.
How Much Does Aluminum Fence Cost in Florida?
Understanding costs upfront prevents budget surprises mid-project.
DIY aluminum fence cost: Material costs for aluminum fencing panels and posts range from roughly $15 to $45 per linear foot depending on style, height, and grade. A standard residential backyard enclosure of 250 linear feet could run $3,750 to $11,250 in materials alone, before tools, concrete, and permit fees.
Professional installation cost: Installed aluminum fence pricing in Florida typically falls between $25 and $45 per linear foot for residential projects, including materials and labor. A 250-linear-foot project averages around $7,500 installed. Ornamental styles, significant slopes, gate additions, or difficult soil conditions push totals toward the higher end of the range.
Additional cost factors to plan for:
- Permit fees: $20 to $60 for standard residential permits, more for pool barrier permits
- Old fence removal: $3 to $5 per linear foot if replacing an existing fence
- Gates: $200 to $600 for a single pedestrian gate; $800 to $1,500 or more for double driveway gates
- Sloped terrain: May require additional posts and labor for stepped or racked installations
The do it yourself route saves on labor but adds time, tool rental costs, and the risk of inspection failure if code requirements aren’t met precisely. For pool barrier installations in particular, a failed inspection means permits, re-inspection fees, and potential delays, which is why professional installation typically pays for itself.
DIY vs. Professional Aluminum Fence Installation in Florida
A straightforward backyard enclosure on flat ground with square corners is a manageable DIY project for someone comfortable with concrete work and basic tools. Budget a full weekend and expect your back to remind you why augers exist.
Where professional installation becomes the clearly better choice:
- Pool barrier projects: Code compliance is non-negotiable, and inspectors know exactly what to look for
- Sloped or irregular yards: Racked and stepped installations require precision and experience
- HOA-governed communities: Documentation, submittal, and approval processes are time-consuming and unforgiving
- Hurricane-wind-load areas: Post depth and concrete volume requirements must be calculated correctly for your specific exposure zone
Canet Group is a licensed and insured outdoor renovation contractor serving South Florida. We handle permitting, HOA documentation, and installation from start to final inspection. Schedule a free consultation and get a clear project estimate before committing to anything.
Ready to Get Your Fence Installed the Right Way?
Whether you’re planning a backyard enclosure, a pool barrier, or a full perimeter fence for your South Florida property, Canet Group Inc. brings licensed, insured expertise and a track record of clean, code-compliant installations throughout Miami-Dade.
We handle the permits. We handle the HOA paperwork. We show up on schedule and finish the job properly so your outdoor space looks sharp and stays standing through whatever Florida weather brings.
Schedule a free appointment today or call us at (786) 397-7139.
Frequently Asked Questions
Do I need a permit to install an aluminum fence in Florida? Yes, in most Florida cities and counties a permit is required for fence installation. Requirements vary by municipality. In Miami-Dade, each incorporated city has its own process. A licensed contractor can handle permitting on your behalf.
How deep should aluminum fence posts be set in Florida? A minimum of 24 inches is the standard for residential fencing in South Florida. Coastal and wind-exposed locations may require deeper footings. Always set posts in concrete, not gravel alone.
Can I install an aluminum fence myself in Florida? Yes, on straightforward projects. However, pool barrier installations, HOA-governed communities, and sloped yards are best handled by a licensed professional to ensure code compliance and avoid costly mistakes.
How much does an aluminum fence cost in Florida? Installed aluminum fence in Florida typically runs $25 to $45 per linear foot for standard residential styles. A 250-linear-foot project averages around $7,500 total with materials and labor included.
How long does aluminum fence last in Florida? Quality aluminum fencing with a powder-coat finish lasts 20 years or more in Florida’s climate, with minimal maintenance required. Unlike wood or iron, it won’t rust, rot, or need periodic painting.
What are Florida’s pool fence requirements? Under Florida Statute 515, pool barriers must be at least 48 inches tall, with picket spacing no greater than 4 inches and less than a 4-inch ground clearance gap. Gates must be self-closing, self-latching, and open away from the pool.